MySQL Installation Guide
MySQL Community EditionThis guide is prepared for Windows platform. You can adapt the steps according to your platform.
How to Install MySQL Community Edition?
Type "mysql community server" keyword into the query box on a search engine page (such as Google), then press ENTER. After searching, click on the first link.
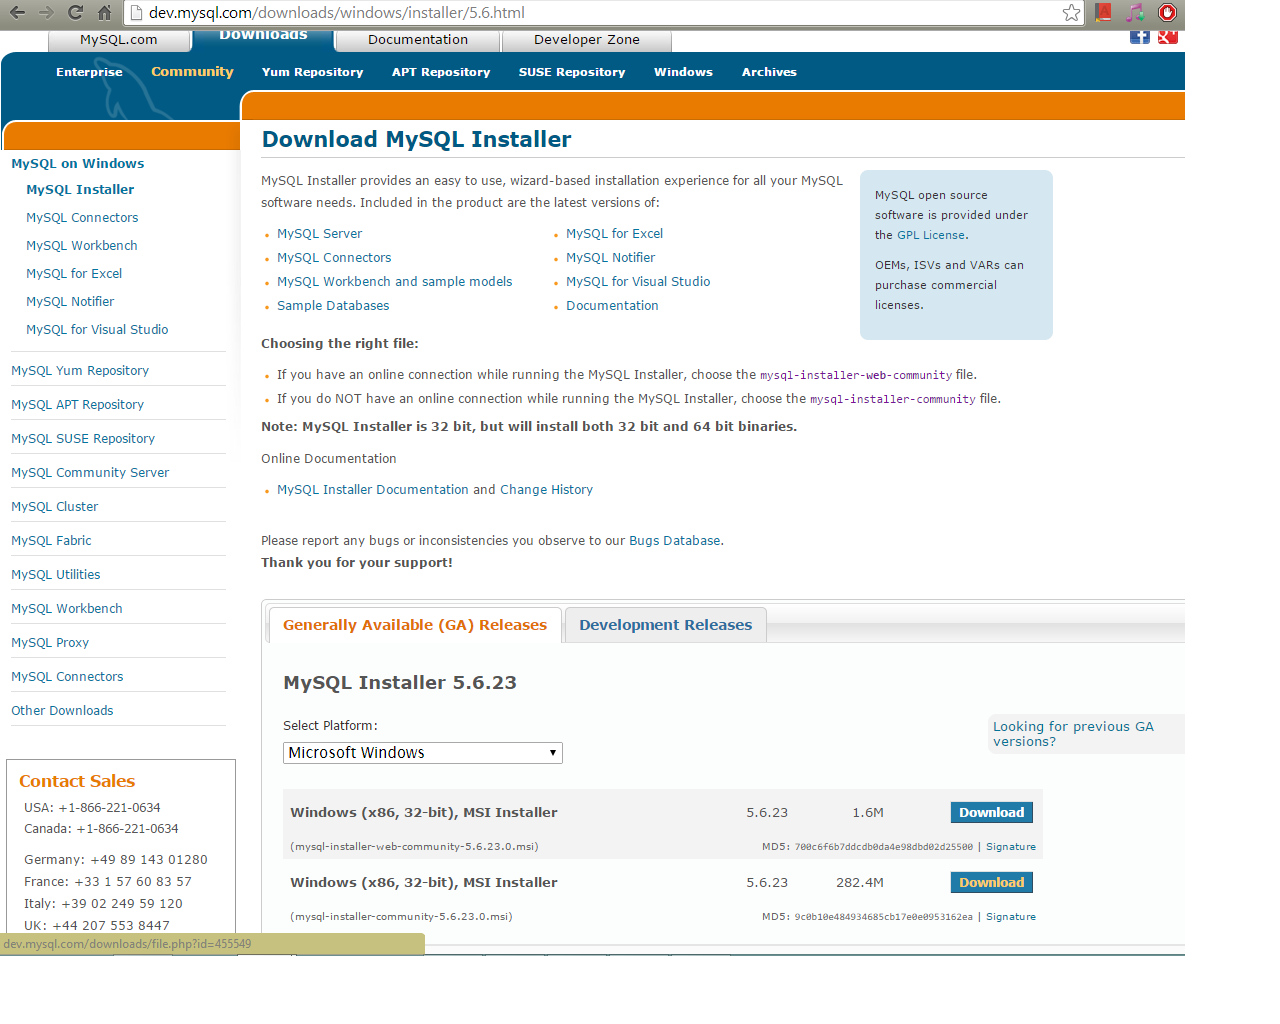
In the opening page select your platform for MySQL Community Server 5.6.23, and click on "Download" button.
You have one more thing to take into consideration: version of the operation system (32-bit vs. 64-bit model)

Click on the second "Download". Download mysql-installer-community-5.6.23.0.msi which have bigger size.
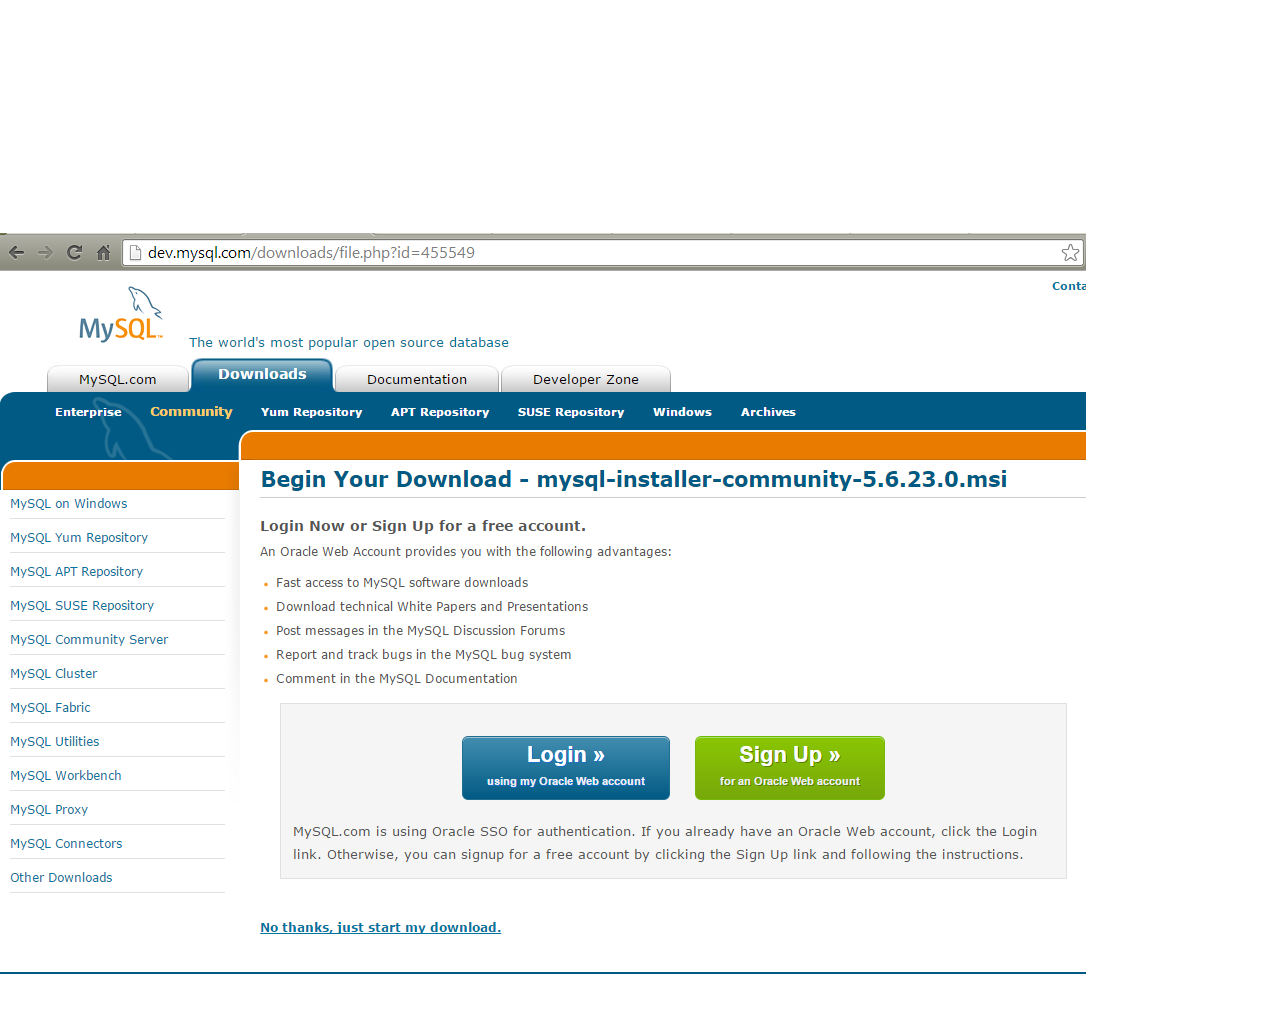
In the opening page click on the link "No thanks, just start my download"
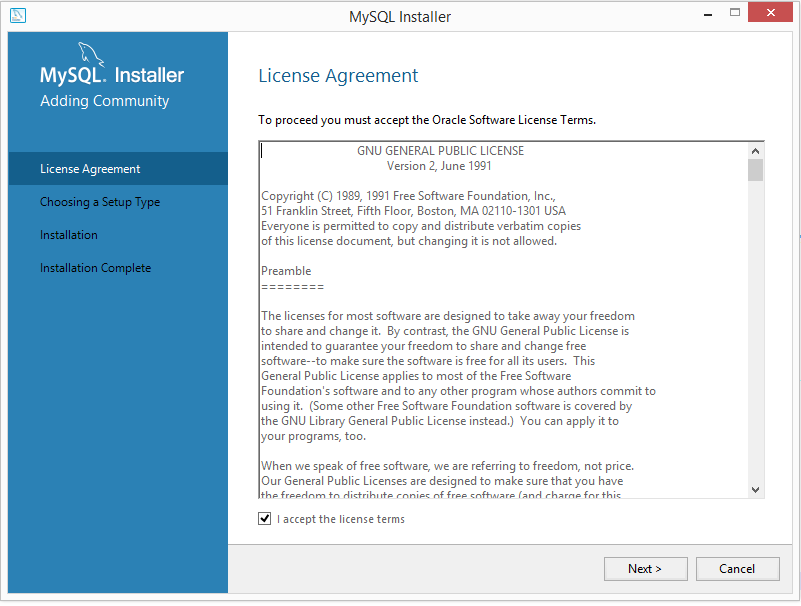
You have downloaded the .msi file. Double click on it.
License agreement. Click on "Next" button.
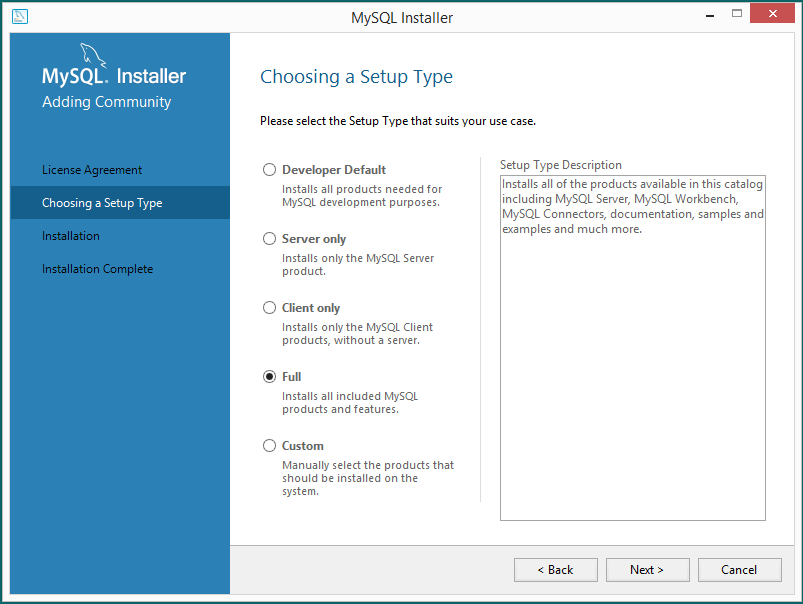
Choose a Setup Type. You can choose any of them but "Full" is recommended. "Full" installs all of the products available in this catalog including MySQL Server, MySQL Workbench, MySQL Connectors, documentation, samples and examples and much more. Click on "Next" button.
Installer try to resolve some requirements. If the requirements are fulfilled, then the installer starts the installation automatically. Otherwise, you have to resolve the failing requirements manually. Click on the "Execute" button.

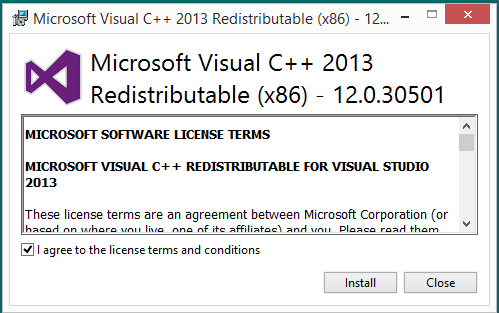
License agreement... Click on "Install" button.
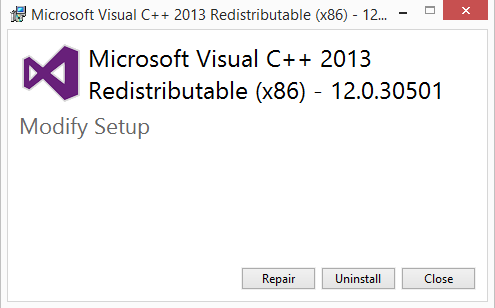
If you encounter the popup window like below, click on the "Repair" button.
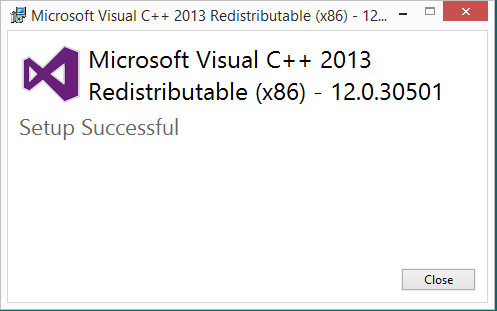
Then, you will have the popup window like below. Click on the "Close" button.
You have met the two requirements MySQL Workbench 6.2.4 and MySQL Fabric 1.5.3 & MySQL Utilities 1.5.3 with the help of the installer.

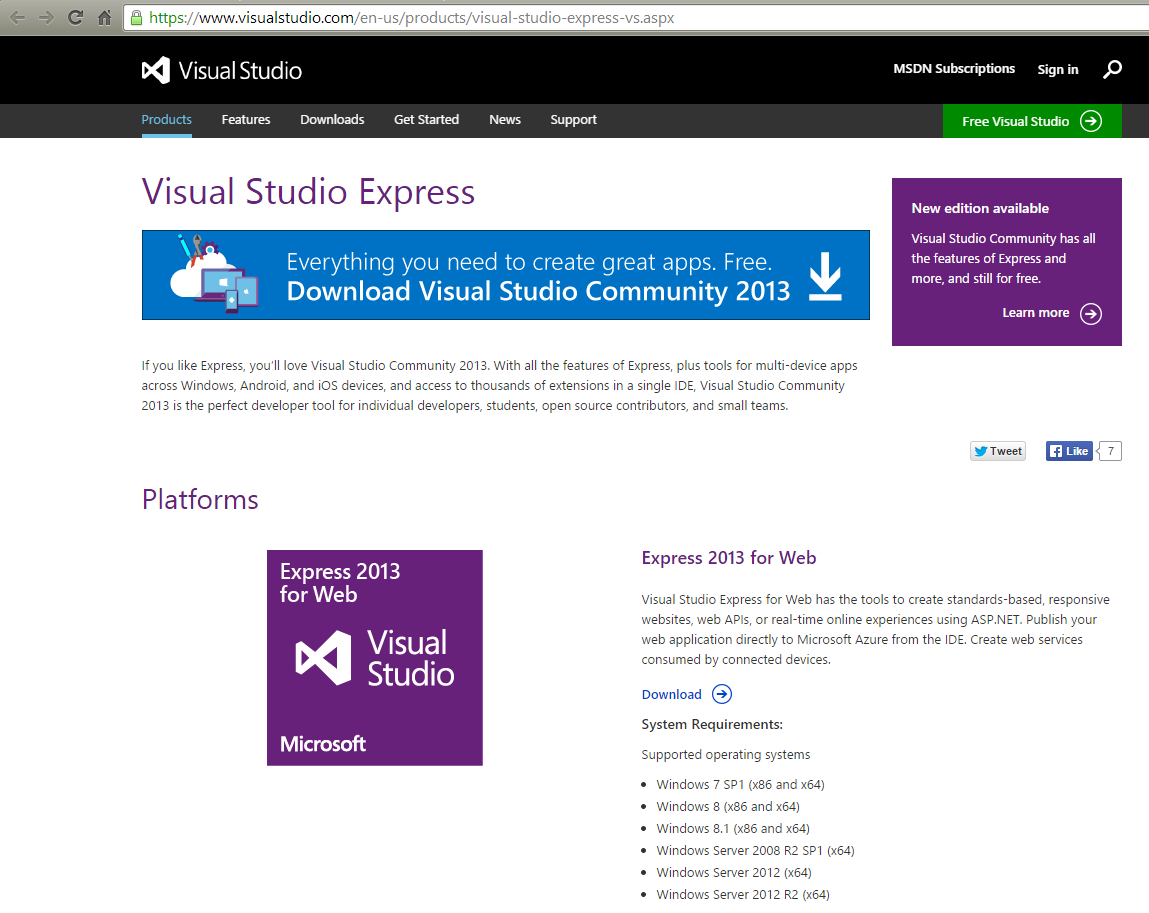
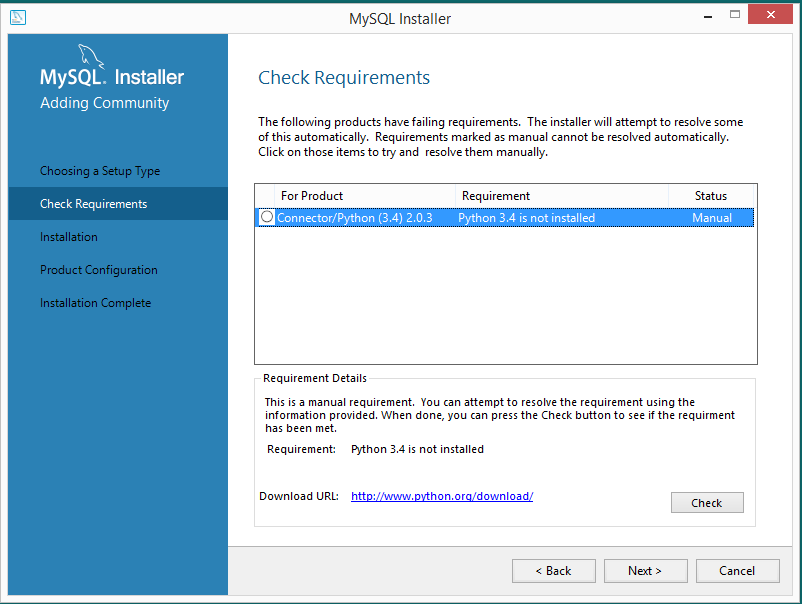
The two requirements "MySQL for Visual Studio 1.2.3" and "Connector/ Python (3.4) 2.0.3" are not fulfilled. So you have to install them manually. Type "free visual studio download" keyword into the query box on a search engine page (such as Google), then press ENTER. After searching, click on the first link.

In the opening page click on "Free Visual Studio" button.
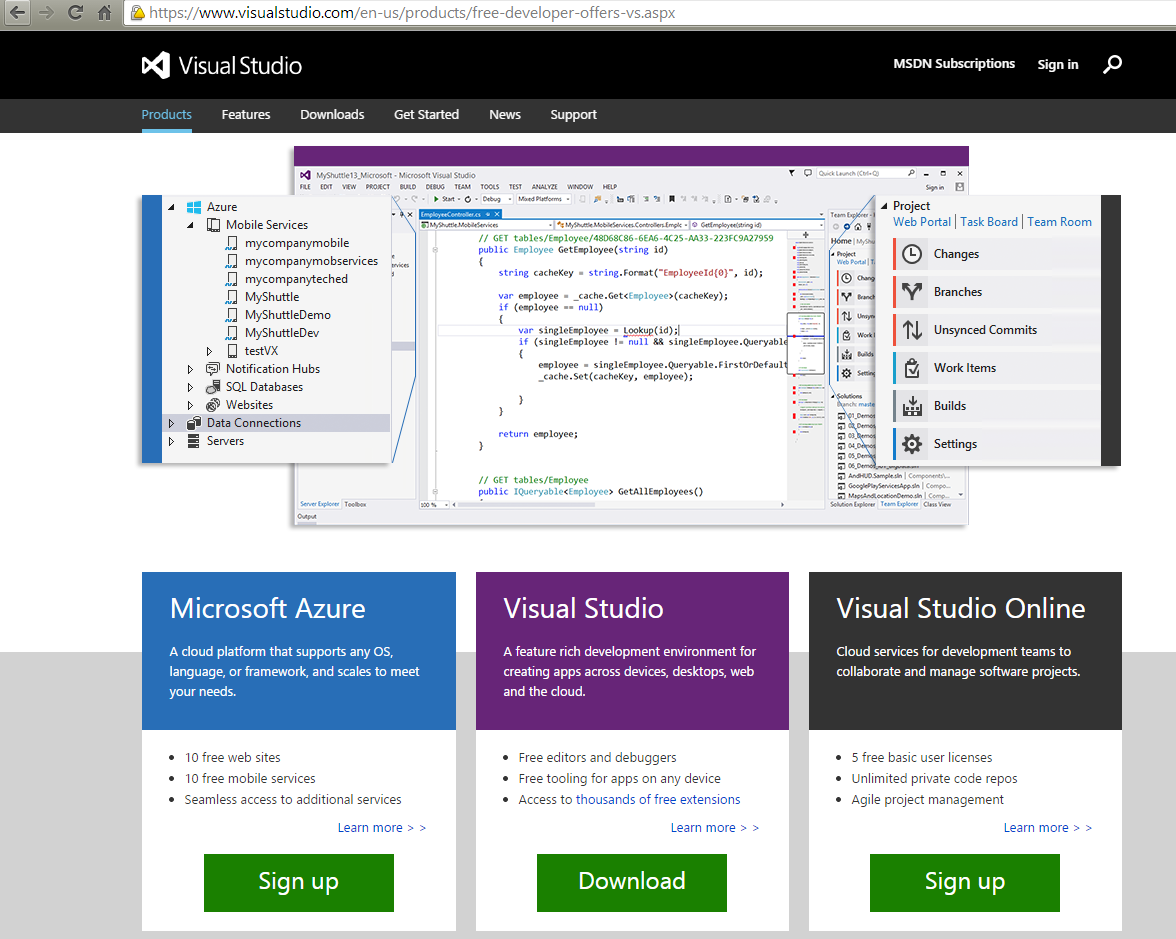
Click on "Download" button for "Visual Studio". Visual Studio is a feature rich development environment for creating applications across devices, desktops, web and the cloud.
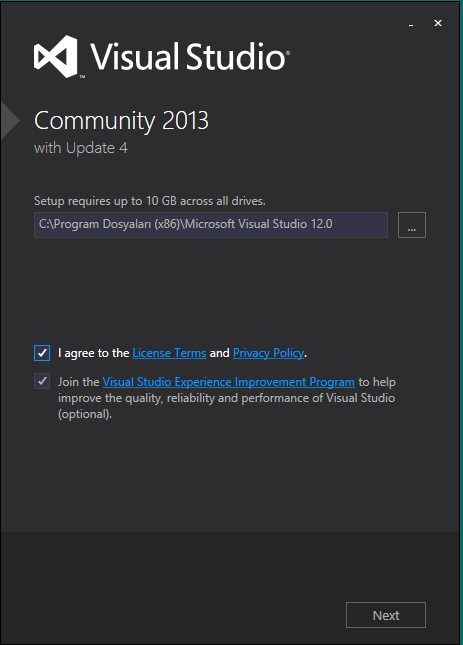
You have downloaded the vs_community.exe file. Double click on it. The setup process is started. Agree to license terms and click on "Next" button.
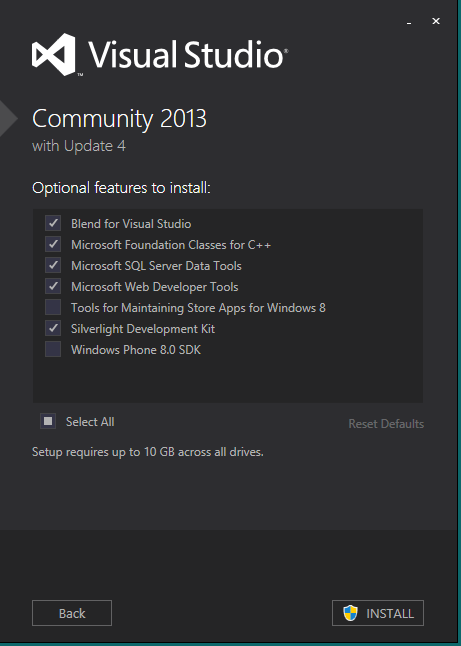
There are optional features to install... Click on "Install" button to install to defaults. This process will take some time.
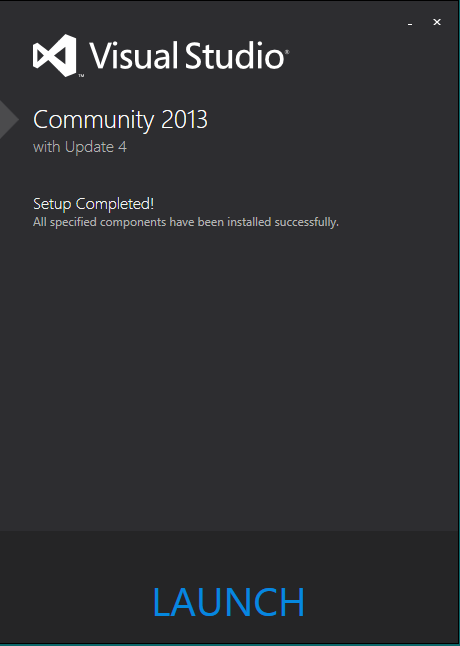
Visual Studio setup is completed!
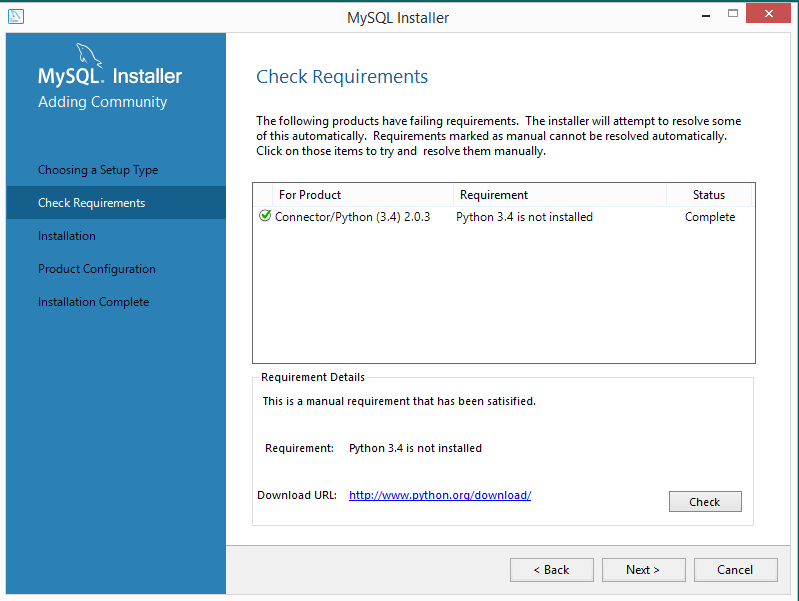
Yo need to check whether you fulfilled the missing requirements or not. Let's return the MySQL Installer. There is only one failing requirement "Connector/ Python (3.4) 2.0.3"
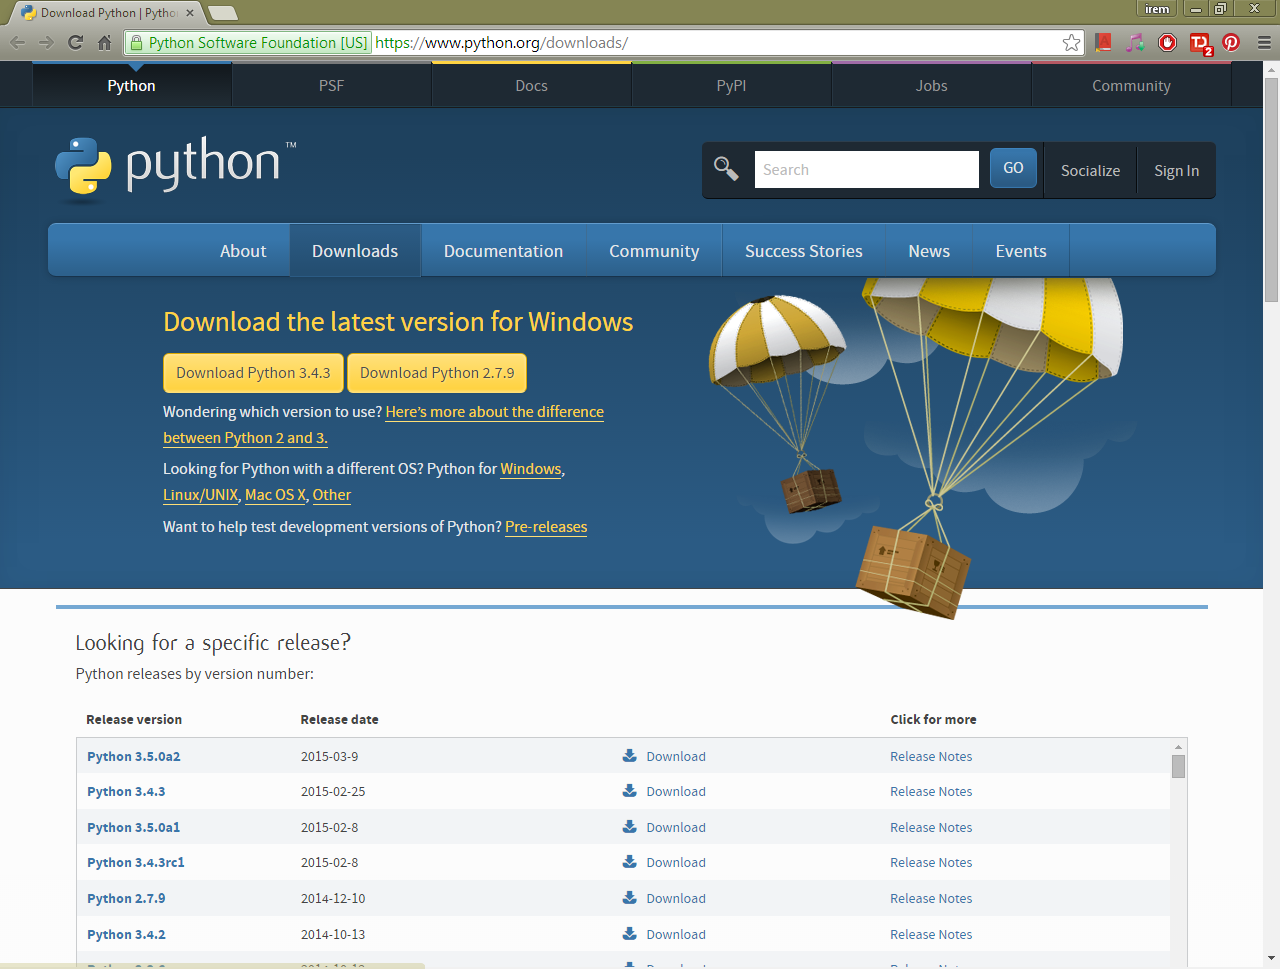
To download Python 3.4, go to URL given https://www.python.org/download/ Download the latest version for your operating system. For Windows users, click on Download Python 3.4.3
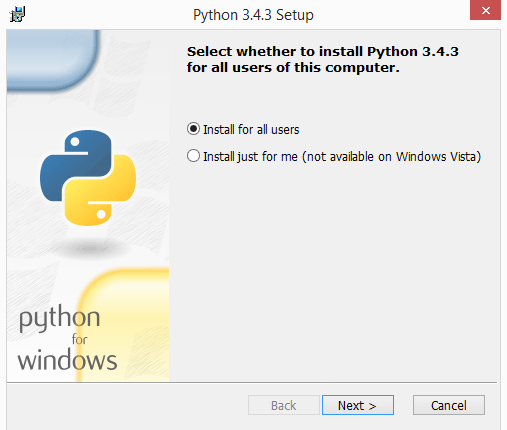
Python 3.4.3 Setup window is opened. Select the installation choice and click on Next
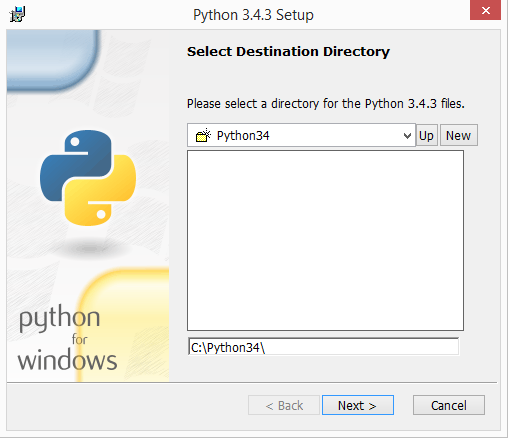
Select destination directory for setup.
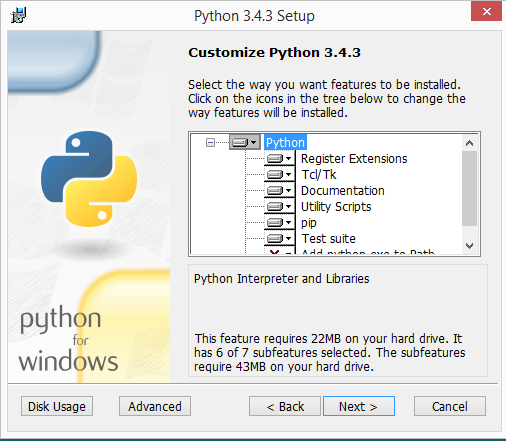
You can customize your setup by changing the way features will be installed.
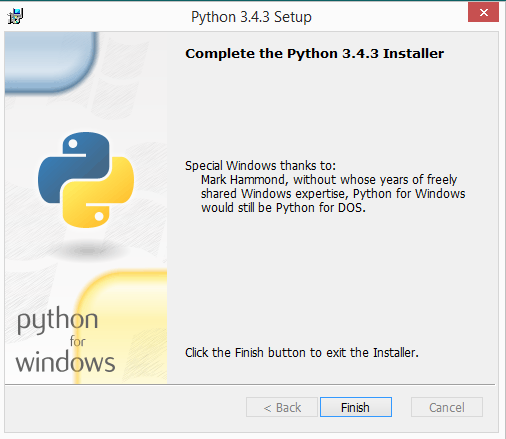
The setup is completed. Click on Finish
Check the situation of the requirement in MySQL Installer. If you encounter a screen like below, you are at the right way. Click on Next button.
Click Execute to install/ update some packages.
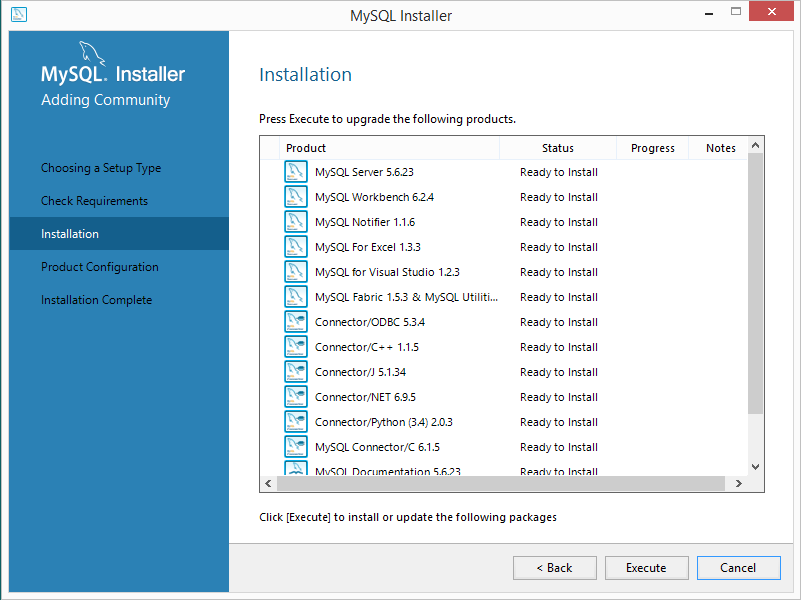
As components are installed, their Status changes from a progress percentage to "Complete".

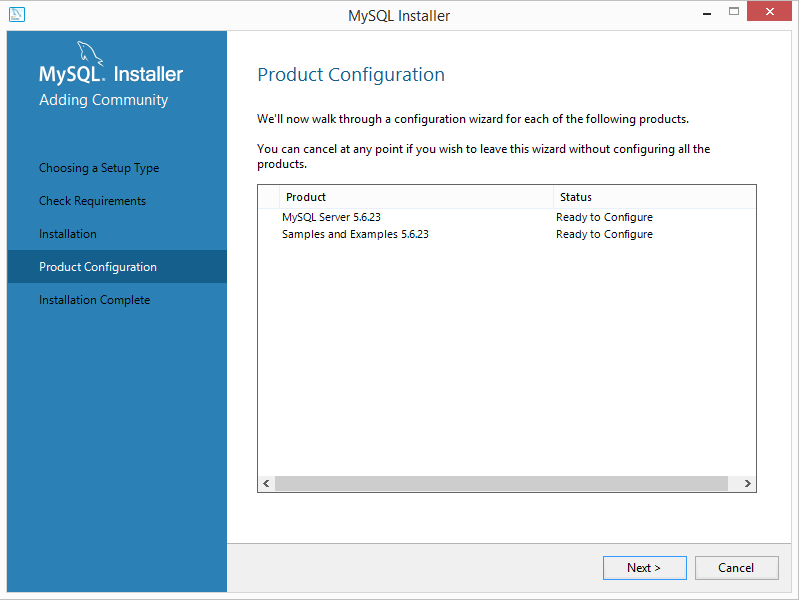
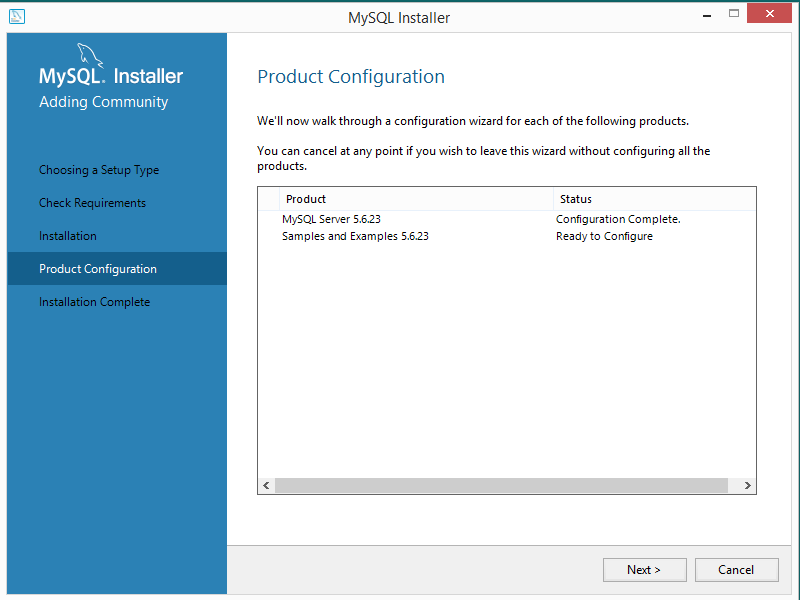
After all components are installed, the next step configures some of the recently installed MySQL products.
Choose the MySQL server configuration type that describes your setup. This setting defines the amount of system resources that will be assigned to your MySQL server instance. You do not need to consider about what those options exactly are. You can continue with default options. If you want to learn details, you can read this guide: http://dev.mysql.com/doc/mysql-installer/en/mysql-installer-gui.html Checking the "Advanced Configuration" option provides additional Logging Options to configure, so I checked it. (optional)

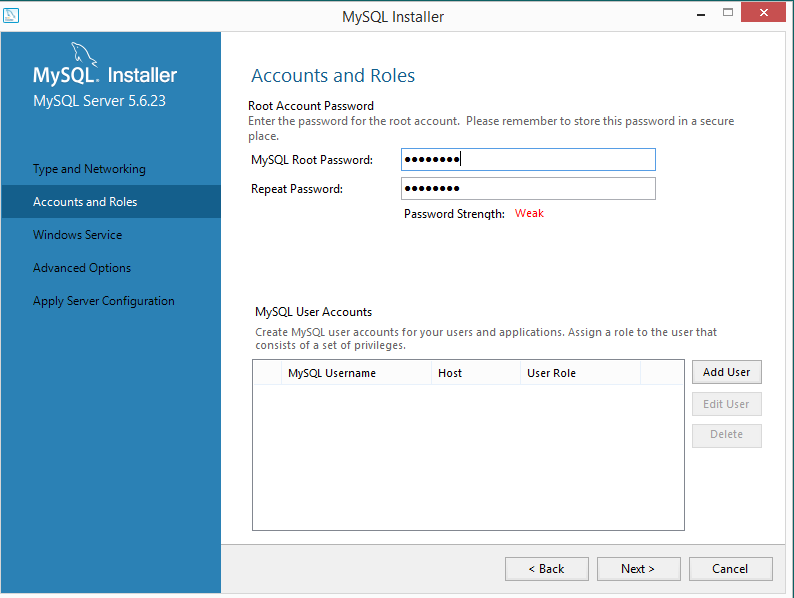
Next, define your MySQL account information. Assigning a root password is required. Optionally, you can add additional MySQL user accounts with predefined user roles.
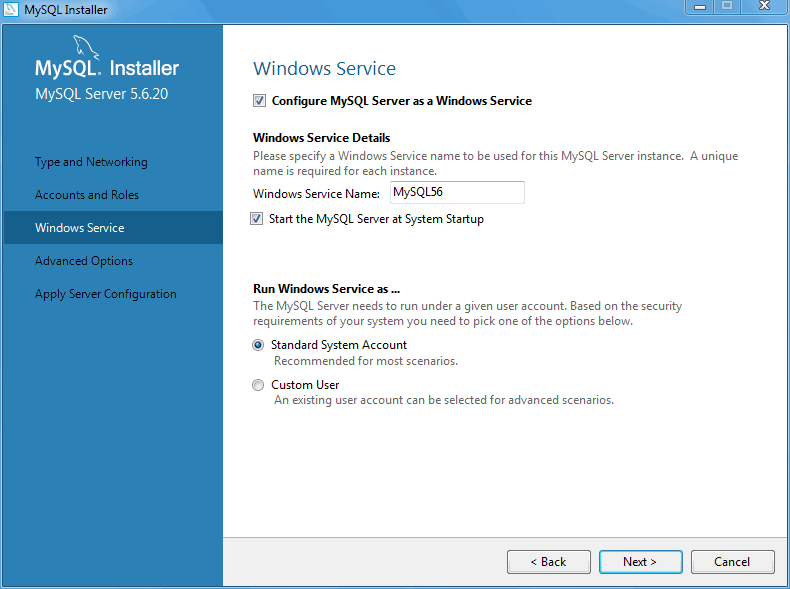
Next, configure the Windows Service details. This includes the service name, whether the MySQL Server should be loaded at startup, and how the Windows Service for MySQL Server is executed.
The next configuration step is available if the "Advanced Configuration option" was checked. This section includes options that are related to the MySQL log files. Click Next to continue on to the final page before all of the requested changes are applied.

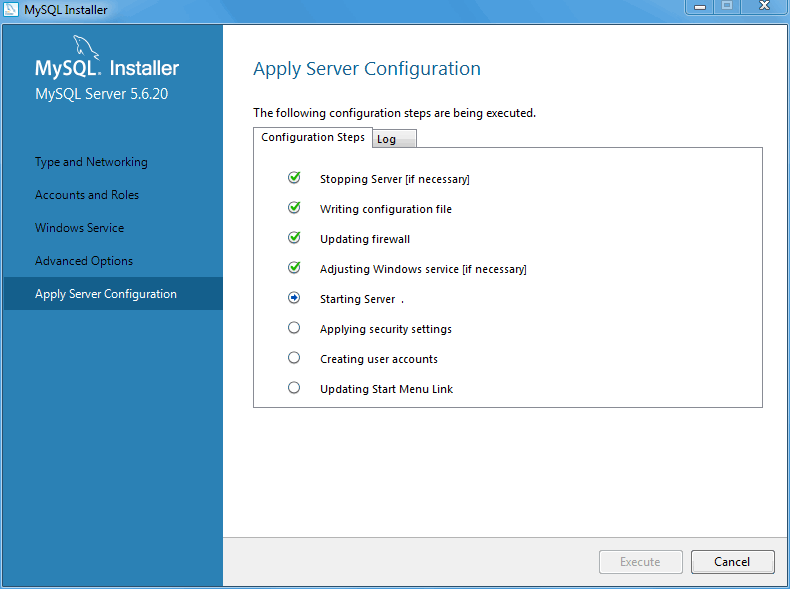
This Apply Server Configuration page details the configuration steps that will be performed. Click Execute to execute the configuration steps. The icon for each step toggles from white to green on success, or the process stops on failure. Click the Log tab to view the log. After the MySQL Installer configuration process is finished, MySQL Installer reloads the opening page where you can execute other installation and configuration related actions. MySQL Installer is added to the Microsoft Windows Start menu under the MySQL group. Click on Finish.
Opening MySQL Installer loads product configuration. Click on Next.
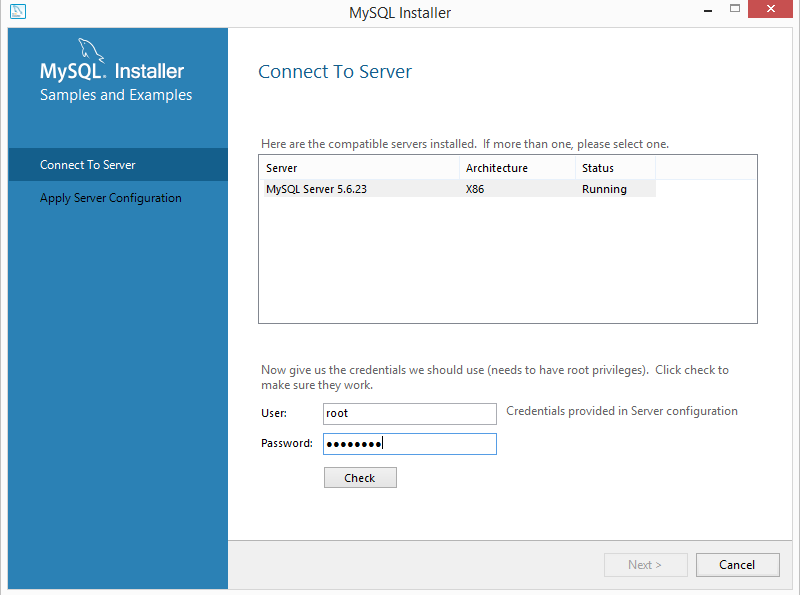
You can check user and password field to have a successful connection. Then, click on Next.
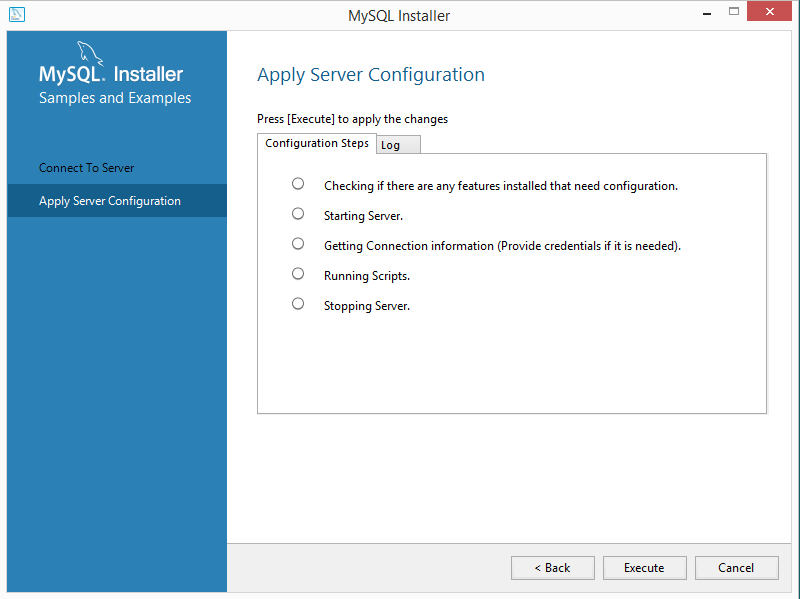
Apply server configuration. Click on Execute. The icon for each step toggles from white to green on success, or the process stops on failure. Click on Finish.
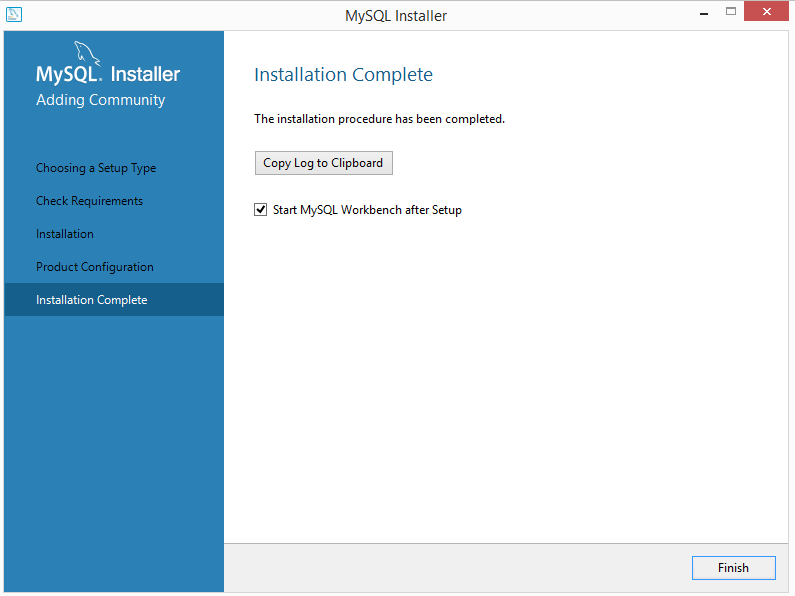
The installation process is completed. Check the "Start MySQL Workbench after setup" option to start the workbench. Click on Finish.